Changing your car’s oil is one of the most essential maintenance tasks every vehicle owner should know. While modern engines and synthetic oils have extended service intervals, regular oil changes remain a pillar of good vehicle health. Not only does clean oil keep your engine parts well-lubricated, but it also removes contaminants, prevents sludge buildup, and helps maintain optimal performance and fuel economy.
For car enthusiasts, doing your own oil change isn’t just about saving money—it’s about staying connected to your machine. There’s something rewarding about popping the hood, getting your hands a little dirty, and knowing the job was done right. Whether you’re working on a brand-new sports coupe or a dependable daily driver, this guide walks you through every step in a practical, informed, and confidence-boosting way.
Let’s break it down so you can handle your next oil change like a seasoned garage pro.
Recognizing When It’s Time to Change Your Oil
Knowing exactly when to change your oil is critical—not too soon, and definitely not too late. While many follow the manufacturer’s maintenance schedule, it’s worth knowing how to recognize the warning signs for yourself. Driving conditions, oil type, and engine age can all influence oil longevity.
Modern cars often come equipped with oil life monitoring systems, but these shouldn’t replace your own awareness. Understanding what dirty oil looks like, how it smells, and how it behaves in the engine can prevent wear and tear and costly repairs.
Here are some signs it might be time:
- Dashboard Oil Light
If your oil pressure or oil change indicator light comes on, it’s time to take action immediately. Low pressure can mean dangerously low oil levels or that the oil has degraded past safe operating conditions. - Engine Noise or Knocking
Fresh oil lubricates engine parts and reduces friction. If oil breaks down, components may grind together, leading to knocking or ticking noises. - Dark, Dirty Oil
Clean oil has a golden, amber hue. Over time, it darkens as it picks up dirt, combustion byproducts, and metal shavings. Check the dipstick—if it’s pitch black or gritty, it’s time for a change. - Oil Smell Inside the Cabin
If you’re smelling burnt oil while driving, you might have a leak, or the oil is overheating and breaking down. Both require attention. - Excessive Exhaust Smoke
Some visible vapor from your tailpipe is normal. But thick, blueish smoke can signal oil burning in the combustion chamber—a possible sign of oil issues.
Gathering the Right Tools and Materials
Preparation makes perfect. Before diving under your car, gather everything you’ll need so the job flows smoothly from start to finish. Each vehicle is slightly different, so always consult your owner’s manual for oil type, filter model, and capacity.
Here’s a comprehensive list to get started:
- Correct Engine Oil (Type & Viscosity): Most modern cars use 5W-30 or 0W-20 synthetic oil, but this varies widely. Always confirm the exact spec recommended by your vehicle’s manufacturer. Using the wrong viscosity can reduce fuel economy or damage engine internals.
- Oil Filter: Spin-on filters are common, but some vehicles use cartridge types. Make sure you get a high-quality replacement. Brands like Mann, Bosch, and Mobil 1 are often recommended.
- Oil Filter Wrench: A strap wrench or cap-style wrench helps remove the old filter, especially when it’s on tight.
- Socket Wrench Set: Needed to remove the drain plug. Most vehicles use a 13mm or 14mm bolt.
- Drain Pan: You’ll need at least a 5-quart pan to collect old oil. Look for one with a built-in spout for easy disposal.
- Funnel: Prevents spills when pouring in new oil, especially useful with narrow oil filler openings.
- Gloves & Rags: Keep your hands clean and ready. Rags are essential for cleaning up spills and wiping down the dipstick.
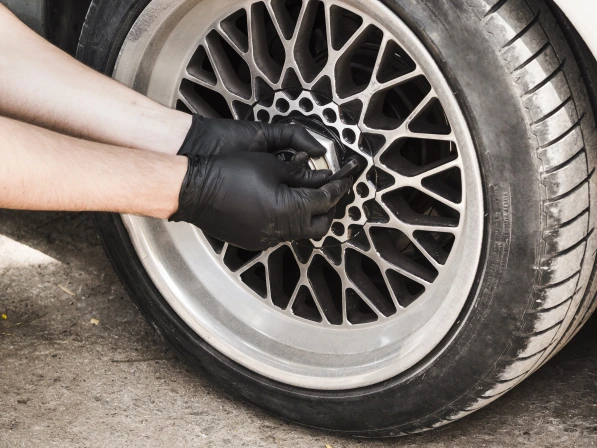
- Jack and Jack Stands or Ramps: Unless your car or truck sits high enough for easy access, you’ll need to lift it. Use jack stands—never rely on a jack alone. If you’re working on a larger vehicle, consider using a heavy-duty jack for trucks to ensure safe and stable lifting.
Preparing the Vehicle for an Oil Change
Once you’ve decided it’s time to change your oil, preparation is everything. This is where a smooth and safe oil change begins. Whether you’re in a well-lit garage or your driveway, properly setting up ensures both your safety and a mess-free, efficient job. It also minimizes the risk of cross-threading components or forgetting steps.
Before lifting the vehicle, make sure it’s been parked for a short time after a drive. Warm oil flows out more easily than cold oil, but you don’t want the engine or oil to be scorching hot. A mildly warm engine makes draining more efficient while keeping you safe from burns.
Here’s what to do to get your car ready:
- Park on a Level Surface
Choose a flat, stable area with enough working space around the vehicle. This ensures safe jacking and prevents oil from sloshing unevenly during draining. - Allow the Engine to Cool Slightly
Ideally, let the engine cool for about 20–30 minutes after driving. This gives you warm oil that flows freely, without the risk of scalding yourself on hot components. - Engage the Parking Brake
Always secure the vehicle before getting underneath. This simple habit can prevent serious injury from a rolling car. - Use Wheel Chocks (View on Amazon)
Place chocks behind the rear tires (or front if working on a rear-wheel-drive vehicle) to provide extra stability and prevent accidental movement. - Lift the Vehicle with a Jack and Support It with Jack Stands (View on Amazon)
Never work under a vehicle supported only by a jack. Use jack stands rated for your vehicle’s weight and place them on designated lift points, as identified in your owner’s manual. - Wear Gloves and Safety Glasses
Even a basic oil change can expose you to harmful substances. Gloves protect your skin from used oil, while safety glasses shield your eyes from splashes or debris. - Lay Down a Protective Surface
Use a garage mat, cardboard, or even an old towel under the vehicle to catch drips and protect your work area from stains.
The Step-by-Step Oil Change Procedure
Now that your car is safely positioned and properly prepared, it’s time to dive into the heart of the job—the actual oil change. This phase demands both precision and care. Every step plays a vital role in ensuring your engine receives fresh, clean oil and continues running smoothly.
Rushing or skipping details here can lead to leaks—whether from the drain plug or elsewhere, like a leaky valve stem—as well as stripped threads or engine damage. Take your time and follow this proven routine closely.
Here’s your detailed, step-by-step walkthrough:
- Locate the Oil Drain Plug
Typically found at the lowest point of the oil pan beneath your engine, the drain plug is your gateway for releasing old oil.
Use the correct size socket or wrench to avoid rounding off the bolt head. Loosen it slowly and carefully—oil can be hot and may gush out suddenly. Position your drain pan directly underneath to catch every drop and prevent spills.
- Drain the Old Oil Completely
Patience is key here. Allow several minutes for gravity to pull the oil fully from the pan. If you want to be thorough, slightly tilting the car by adjusting your jack stands or ramps can help flush out residual oil trapped in crevices.
Remember, any leftover dirty oil reduces the effectiveness of your fresh fill.
- Remove and Replace the Oil Filter
Your oil filter traps dirt and metal particles to keep your engine oil clean. Use an oil filter wrench to carefully unscrew the old filter—it may contain residual oil, so keep your drain pan or rags handy.
Before installing the new filter, apply a thin layer of clean oil to the rubber gasket; this lubricates the seal, preventing leaks and making future removal easier.
- Clean and Replace the Drain Plug
Wipe the drain plug and surrounding threads thoroughly to remove grime or old gasket material. If your drain plug uses a crush washer or gasket, always replace it to ensure a tight seal. Screw the plug back in and tighten it snugly, but don’t overdo it—overtightening can strip threads or damage the oil pan. - Add New Oil
Open the hood and remove the oil filler cap. Using a funnel to avoid spills, pour in the recommended type and quantity of fresh oil as specified by your owner’s manual. Pour slowly, checking your fill level periodically—this helps avoid accidental overfilling. - Check the Oil Level
After filling, wait a minute or two to let the oil settle. Then, pull out the dipstick, wipe it clean, reinsert it fully, and pull it out again to check the level.
The oil should fall between the “Min” and “Max” marks. If it’s low, add oil gradually; if it’s high, remove some to avoid pressure issues or foaming inside the engine.
Post-Service Checks and Final Touches
Don’t pack up yet—these finishing touches are just as critical as the actual oil swap. They ensure everything is sealed, filled, and running as it should.
- Start the Engine and Let It Idle
Let the car run for 1–2 minutes. This helps circulate the new oil and reveals any possible leaks at the filter or drain plug. - Inspect for Leaks
Look under the car and around the oil filter. A few drips may be residue, but anything more than that needs attention. - Recheck the Oil Level
Once the car has idled and been turned off for a few minutes, check the dipstick again. Adjust if necessary. - Reset the Oil Change Indicator
Most newer vehicles require a manual reset of the maintenance or oil life monitor. Check your owner’s manual or onboard screen for instructions. - Properly Dispose of Used Oil and Filter
Used motor oil is toxic and should never be dumped. Take it to a recycling center or auto parts store that accepts waste oil.
Mistakes You’ll Want to Avoid
Even the most experienced DIYers occasionally slip up when changing their oil. It’s easy to underestimate how small mistakes can lead to big headaches, like leaks, costly repairs, or engine trouble down the road.
Being aware of these common pitfalls will help you avoid unnecessary frustration and keep your car running smoothly.
Overtightening Components – this one trips up a surprising number of folks. It’s tempting to crank down hard on the oil filter or drain plug, thinking that tighter means better. But in reality, a snug fit is all you need.
Pushing too hard risks stripping threads, cracking your oil pan, or crushing seals, which can make future oil changes a nightmare. Taking a little extra care with a torque wrench (or following manufacturer specs) goes a long way in preventing damage.
Forgetting to Reinstall the Drain Plug – believe it or not, this is a more common blunder than you’d imagine. It’s easy to get distracted and skip this critical step, but pouring fresh oil without that plug in place means you’ll have a mess—and wasted oil—on your hands.
A simple habit of putting the plug back in right after draining and double-checking it’s tight can save you from this rookie mistake.
Using the Wrong Type or Amount of Oil – choosing the right oil isn’t just a detail; it’s crucial for your engine’s well-being. The viscosity numbers on your oil (like 5W-30 or 0W-20) are specifically designed to match your engine’s requirements.
Using the wrong grade or overfilling can lead to poor lubrication, increased wear, or even engine warning lights. Always stick to the oil type and amount your owner’s manual recommends—your engine will thank you.
Skipping the Oil Filter Replacement – some might think, “If the old filter looks okay, why bother changing it?” The truth is, the oil filter is working overtime to catch dirt and metal particles.
Leaving the old one in lets those contaminants keep circulating, which can cause serious engine issues over time. For peace of mind, make it a rule to replace the oil filter with every oil change—it’s a small step with big benefits.
Not Disposing of Waste Properly – this one affects more than just your car. Used motor oil is toxic and bad for the environment, so dumping it anywhere but a recycling center is both harmful and usually illegal.
Instead, collect your used oil and filters carefully and take them to an authorized recycling facility or auto parts store that accepts them. It’s a simple way to do your part and keep your community clean.
By keeping these common mistakes in mind and approaching your oil change with care, you’ll avoid headaches and keep your engine in great shape for miles to come.
.
When to Leave It to the Pros
Even for the most hands-on enthusiast, there are times when handing the job over to a certified technician simply makes more sense. While changing your own oil can be deeply satisfying—and often cost-effective—certain vehicles, setups, or conditions might turn this straightforward task into something more complicated, time-consuming, or even risky.
Knowing when to step back is part of being a responsible car owner. Professional oil changes don’t just offer convenience—they come with the benefit of trained eyes, specialty tools, and sometimes, even a free inspection that might uncover issues before they become serious problems.
Here are a few scenarios where the smarter play is to let the pros handle it:
- Low Ground Clearance or Difficult Access
Sports cars, performance sedans, and many hybrids sit much lower to the ground, making it tricky—or even dangerous—to get underneath safely without the right ramps or a proper lift.
Some vehicles even hide their oil filters behind splash shields or tucked-away compartments, requiring disassembly before you even see the filter. Unless you have a lift and the proper clearance equipment, you’re better off at a shop.
- Stripped Drain Plugs or Damaged Oil Pans
If your drain plug spins without loosening or the oil pan shows signs of cracking or thread damage, stop immediately. Forcing it could cause further damage, leading to leaks or even complete pan failure.
A repair shop can tap new threads, replace gaskets, or even swap pans without the trial and error of a DIY fix.
- Manufacturer-Specific Filters or Tools
Vehicles from manufacturers like BMW, Mercedes-Benz, or Audi often use oil canisters, torque-specific drain plugs, or require filter removal tools unique to their platform.
Using the wrong filter or overtightening hardware can void warranties or cause oil starvation. Technicians at specialty shops will have access to the correct tools and OE-grade parts.
- Bundled Maintenance and Inspections
If your vehicle is already due for tire rotation, brake service, or a fluid flush, combining the oil change with these services can save both time and money.
Most shops offer multi-point inspections as part of routine oil service, which can help catch worn belts, low fluids, or worn-out components before they turn into costly problems.
Frequently Asked Questions (FAQ)
Q: How often should I change my car’s oil?
A: Most manufacturers recommend oil changes every 5,000 to 7,500 miles for synthetic oil, and around 3,000 miles for conventional oil. However, always consult your owner’s manual as intervals vary by make and driving conditions.
Q: Can I use any type of motor oil for my car?
A: No. It’s essential to use the oil grade and viscosity recommended by your vehicle manufacturer to ensure proper lubrication and engine protection.
Q: How do I know if my oil is low between changes?
A: Regularly check the dipstick under the hood. If the oil level is below the minimum mark, add the recommended oil type to avoid engine damage.
Q: Is it safe to drive immediately after an oil change?
A: Yes, but it’s good practice to start the engine, let it idle briefly, and check for leaks before driving off.
Q: What happens if I overfill my engine with oil?
A: Overfilling can cause increased pressure inside the engine, leading to foaming, leaks, and reduced lubrication efficiency, which may damage engine components.
Q: Can I skip changing the oil filter when changing oil?
A: It’s not recommended. The oil filter traps contaminants; leaving an old filter reduces oil cleanliness and can harm your engine.
Q: How should I dispose of used motor oil and filters?
A: Used oil and filters must be taken to recycling centers or auto shops that accept them. Never pour oil down drains or throw filters in the trash.
Q: Is synthetic oil better than conventional oil?
A: Synthetic oils generally offer better performance, longer intervals between changes, and improved engine protection, especially under extreme temperatures.
Q: Can I change my oil without lifting my car?
A: Some vehicles have accessible drain plugs and filters reachable without jacking up the car, but lifting is often necessary for safe and thorough access.
Q: What tools do I need for a DIY oil change?
A: Basic tools include the correct engine oil and filter, oil filter wrench, socket wrench for the drain plug, drain pan, funnel, gloves, and jack stands or ramps if lifting the vehicle.
Final Thoughts
A well-done oil change keeps your engine healthy, improves efficiency, and gives you a stronger sense of connection with your car. Whether you’re a seasoned DIY enthusiast or just getting into automotive maintenance, the process can be as rewarding as it is essential.
With the right tools, safety prep, and attention to detail, changing your oil becomes more than a chore—it becomes part of your passion for driving.
Stay sharp, stay clean, and keep those engines humming.