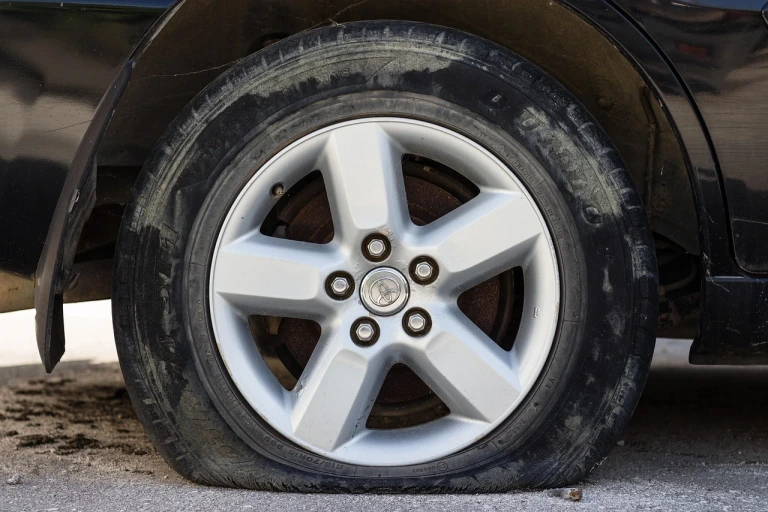
Most drivers never think twice after getting new tires installed—until something feels ‘off.’ A faint vibration, a slight shudder, a hint of looseness that doesn’t quite make sense. What many don’t realize is that these tiny warnings can be the early signs of a wheel working itself loose because the lug nuts were never retorqued.
Sound dramatic? It happens more than you’d think.
Here’s what makes this particularly frustrating: Tire retorquing is one of the simplest, quickest safety procedures in automotive maintenance—it takes maybe 10 minutes and costs nothing at most shops—yet it’s routinely skipped, forgotten, or dismissed as unnecessary by drivers who don’t understand what they’re risking. The lug nuts holding your wheels on aren’t just tightened once and done. They settle, shift, and can loosen after initial installation, and if you don’t check and retighten them properly, you’re driving with wheels that are literally coming undone.
For anyone who’s had tires mounted, wheels removed for brake work, or switched seasonal rubber, understanding tire retorquing isn’t optional knowledge—it’s essential safety awareness that could prevent catastrophic wheel failure.
And that’s exactly what we’re breaking down today.
Stick with us to the end as we explain what tire retorquing actually means (because “retorque” sounds more complicated than it is), when you absolutely need to do it, how to retorque your lug nuts properly, whether at home or at the shop, and why skipping this step is genuinely dangerous. Whether you’re a DIY enthusiast who changes your own tires, someone who relies on tire shops, or just trying to understand why that reminder card says “return in 50-100 miles,” this guide gives you the knowledge to keep your wheels securely attached where they belong.
Understanding Tire Retorquing: What It Actually Means
Before we get into the how and when, let’s clarify what we’re actually talking about—because “retorquing” sounds more technical than the concept really is.
Retorquing simply means rechecking and readjusting the tightness of your wheel lug nuts after they’ve been initially installed. That’s it. You’re not doing anything complicated—you’re verifying that the nuts holding your wheels on are still at the correct tightness specification after the wheel has been driven and subjected to real-world forces.
Here’s why this matters: When lug nuts are first tightened during tire installation, they’re torqued to a specific force measurement (usually 80-100 ft-lbs for most passenger vehicles, though specs vary). This initial torque feels secure, and technically it is—but only temporarily.
Once you start driving, several things happen that can affect lug nut tightness:
The wheel settles – New or freshly installed wheels compress slightly against the hub as vehicle weight and driving forces push everything together. This settling can cause lug nuts to loosen slightly, even though they were properly tightened initially.
Thermal cycling occurs – Braking generates heat that causes wheel components to expand and contract. Temperature changes—from cold morning starts to hot afternoon driving—create similar expansion and contraction cycles. These thermal cycles can cause microscopic shifting in how components seat together. If you’re curious how controlled heat cycling works on performance tires, see our guide on heat cycling tires.
Road vibrations take effect – Every bump, pothole, and road irregularity creates vibration and force transmitted through the wheel assembly. Over the first 50-100 miles, these vibrations can loosen lug nuts slightly, especially if there was any contamination during installation.
Initial seating completes – Sometimes dirt, rust, grit, or even brake dust on threads or mounting surfaces creates “false torque” during installation—meaning the torque wrench says you’ve reached spec, but some of that force is overcoming friction from contamination rather than creating proper clamping force. After driving clears this contamination, true seating occurs, which can result in reduced clamping.
The retorque procedure accounts for all of these factors by giving you a second chance to verify and adjust lug nut tightness after the wheel has experienced real-world operating conditions.
The Difference Between Initial Torque and Retorque
Initial torque happens when the wheels are first installed. The technician (or you, if DIY) uses a torque wrench set to manufacturer specifications to tighten each lug nut to precise specifications in a star pattern.
Retorque happens after 50-100 miles of driving. You (or the shop) recheck each lug nut with a torque wrench to verify they’re still at the correct specification—and adjust any that have loosened or (rarely) overtightened.
Think of it like tightening a bolt on furniture. You tighten it initially, but after you’ve used the furniture and it’s settled under load, you often need to snug things up again. Same principle, much higher stakes.
When You Must Retorque: Critical Timing Windows
Knowing when to retorque is just as important as knowing how. Here are the mandatory scenarios where retorquing isn’t optional—it’s essential.
After New Tire Installation (50-100 Mile Rule)
When: After driving 50-100 miles (80-160 km) following new tire installation.
Why: This is the most critical retorque window. New tires on new or existing wheels need time to settle and seat properly. The first 50-100 miles allow all components to compress, thermal cycles to occur, and any installation contamination to clear.
What shops do: Reputable tire shops provide a reminder card or sticker asking you to return for a free retorque check within this window. Some even text or call reminders. Don’t ignore these—they’re protecting you from wheel separation incidents.
Real-world note: Continental Tire specifically recommends retorquing after the first 50 km (30 miles) following any wheel installation, and most tire manufacturers echo this guidance. It’s industry-standard practice based on decades of data showing lug nuts frequently need adjustment after initial settlement.
After Seasonal Tire Changeovers
When: After swapping between winter and summer tires (50-100 miles again).
Why: Whether you’re changing tires on existing wheels or swapping complete wheel/tire packages, you’re removing and reinstalling wheels, which means everything we discussed about settling and seating applies.
Common mistake: Drivers who do seasonal changes twice yearly sometimes skip retorquing because “the wheels have been on before.” Doesn’t matter—every time the wheels come off and go back on, retorque is necessary.
DIY consideration: If you change your own seasonal tires, invest in a quality torque wrench and make retorquing part of your routine 50-100 miles after installation.
After Any Wheel Removal Service
When: 50-100 miles after brake work, suspension repairs, wheel bearing replacement, or any service requiring wheel removal.
Why: Even if you’re not getting new tires, anytime wheels are removed and reinstalled, lug nuts need retorquing. The service wasn’t tire-related, but the installation process creates the same settling and seating dynamics.
What to watch for: Some shops focus on the repair work and forget to mention retorquing. If you had brake work done, ask explicitly: “Will I need to return for a retorque check?” If they look confused, go elsewhere for the retorque (and consider finding better shops).
During Regular Maintenance Intervals
When: Every 5,000-10,000 miles or during tire rotations.
Why: Even if wheels haven’t been removed, regular torque checks catch problems before they become dangerous. Lug nuts can loosen gradually from vibration, thermal cycling, and road stress over thousands of miles.
Practical approach: Make lug nut torque checking part of your oil change or tire rotation routine. It takes 5-10 minutes and provides valuable peace of mind.
How to Retorque Tires: Step-by-Step Process
Whether you’re doing this yourself or having a shop perform the service, understanding proper retorque procedure ensures it’s done correctly. Here’s the complete process.
Tools You’ll Need
- Torque wrench – beam, click, or digital type—this is non-negotiable. (Buy on Amazon.)
- Correct socket size for your lug nuts (typically 19mm, 21mm, or 13/16″)
- Vehicle owner’s manual or torque specification chart
- Jack and jack stands – if you’re also checking for other issues. (Buy on Amazon.)
- Wheel chocks – for safety during any vehicle lifting. (Buy on Amazon.)
Why a torque wrench matters: You cannot accurately tighten lug nuts by feel, even with years of experience. Under-tightening risks wheel separation. Over-tightening can strip threads, stretch studs, warp rotors, or snap studs entirely. A calibrated torque wrench is the only way to apply precisely correct force.
Step 1: Find Your Vehicle’s Torque Specification
Where to look:
- Owner’s manual (usually in the maintenance section)
- Driver’s door jamb sticker (sometimes listed)
- Online torque specification databases
- Call your dealership service department
Typical specifications:
- Most passenger cars: 80-100 ft-lbs
- SUVs and light trucks: 90-120 ft-lbs
- Heavy-duty trucks: 120-140+ ft-lbs
- Performance vehicles: Varies widely (check manual)
Critical: Never guess. Using an incorrect torque spec is as dangerous as not retorquing at all.
Step 2: Prepare the Vehicle
Keep wheels on the ground: For retorquing (not initial installation), you want the full vehicle weight on the wheels. This ensures you’re measuring true clamping force, not just thread friction.
Park on level ground: Ensures even weight distribution across all wheels.
Engage parking brake: Prevents vehicle movement during torque application.
Use wheel chocks: Place chocks behind wheels you’re not working on for added safety.
Step 3: Set Your Torque Wrench Correctly
Click-type torque wrench: Rotate the handle to align the desired torque specification with the reference mark. You’ll hear and feel a distinct “click” when target torque is reached.
Beam-type torque wrench: Simpler but requires watching the pointer reach the target on the scale while tightening.
Digital torque wrench: Enter the target specification; the wrench alerts you (beep/vibration/light) when reached.
Pro tip: Start with your torque wrench set to half the target specification for the initial pass, then full specification for the final pass (we’ll explain why in the tightening steps).
Step 4: Follow Proper Tightening Sequence
Star pattern is mandatory: For 5-lug wheels, tighten in a star/pentagram pattern (tighten one, skip to the opposite side, continue around). For 4-lug wheels, use a cross/X pattern. For 6+ lugs, follow an alternating opposite pattern.
Why this matters: Tightening in sequence ensures even pressure distribution and proper wheel seating. Going around in a circle creates uneven clamping that can warp brake rotors and prevent proper wheel seating.
The sequence for 5-lug wheels: If you number lug positions 1-5 clockwise, tighten in order: 1→3→5→2→4
The sequence for 4-lug wheels: Tighten opposite pairs: top→bottom→left→right
Step 5: Two-Stage Tightening Method
Stage 1 – Half Torque Pass: Set torque wrench to 50% of specification. Go around once in proper sequence, tightening each lug to half torque. This pre-seats everything evenly.
Example: If spec is 100 ft-lbs, do first pass at 50 ft-lbs.
Stage 2 – Full Torque Pass: Reset torque wrench to full specification. Go around again in the same sequence, tightening each lug to the final torque.
Why two stages? This method ensures even seating and prevents one lug from being overtightened while others are still loose. It’s professional best practice and takes only an extra minute.
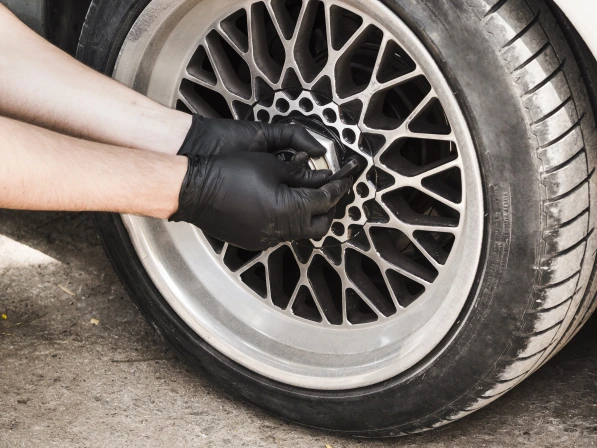
Step 6: Verify Each Lug Nut
What you’re checking: Place the torque wrench on each lug and apply gradual pressure. If the wrench “clicks” immediately without any movement, that lug is at spec. If you feel/hear the lug tightening before the click, it was loose and you just corrected it.
What you might find:
- Most lugs click immediately (good—they were still at spec)
- Some lugs tighten 1/8 to 1/4 turn before clicking (normal settling)
- A lug tightens significantly (½+ turn) before clicking (this is why retorquing matters!)
- A lug already feels overtight (rare but dangerous—needs backing off and retightening to spec)
If you find loose lugs: Don’t panic, but recognize you caught a potentially dangerous situation. This is exactly why retorquing exists.
Step 7: Double-Check Critical Wheel
If any wheel had multiple loose lugs or one very loose lug, check all lugs on that wheel again after another 50 miles. Something may have prevented proper initial seating on that corner.
What Happens If You Skip Retorquing?
Understanding the actual risks helps motivate proper retorquing. Here’s what can go wrong:
Wheel separation (worst case): If lug nuts loosen sufficiently, the wheel can literally come off while driving. At highway speed, this causes complete loss of control and often results in serious or fatal accidents. The wheel becomes a several-hundred-pound projectile, potentially striking other vehicles or pedestrians.
Partial loosening with wobble: Before complete separation, loose lug nuts cause wheel wobble that you’ll feel through the steering wheel or seat vibration. Continuing to drive in this condition damages wheel studs, hubs, and bearings—turning a free retorque into hundreds or thousands in repair costs.
Stud damage: Loose lug nuts allow wheels to shift and wobble on studs. This back-and-forth motion elongates stud holes, damages threads, and weakens studs themselves. Eventually, studs snap, requiring complete hub replacement.
Brake rotor warping: Uneven lug nut tightness (some tight, some loose) causes uneven clamping pressure on brake rotors. This creates a distortion that manifests as brake pulsation or vibration. New rotors become warped rotors requiring replacement.
Thread stripping: If some lug nuts are over-torqued while others are loose (common when using impact wrenches without torque verification), the overtight ones can strip threads permanently, requiring stud replacement.
Professional Retorquing vs. DIY: Pros and Cons
You can have shops retorque tires or do it yourself. Both approaches have merit.
Professional Shop Retorquing:
Pros:
- Usually free after initial installation
- Technicians use calibrated torque wrenches
- Quick (10-15 minutes typical)
- They spot other issues (damaged studs, warped rotors, etc.)
- No tools required on your part
Cons:
- Requires a return trip to the shop
- Scheduling/waiting time
- Must trust the shop uses proper tools and procedures
- Not all shops offer free retorque after initial service
DIY Retorquing:
Pros:
- Do it on your schedule
- Learn your vehicle better
- Quality torque wrench pays for itself over time
- Verify shop work if you’re skeptical
- Catches problems immediately
Cons:
- Initial tool investment
- Requires learning proper technique
- Must find and verify the correct torque specs
- Physical capability required (torquing requires strength)
Recommendation: If the shop offers free retorque, use it—but verify they’re actually using a torque wrench, not just checking by hand or impact gun. For DIYers who change their own tires, invest in a good torque wrench. It’s essential, not optional.
Common Mistakes to Avoid
Even when people retorque, mistakes happen. Avoid these common errors:
Using impact guns for final tightening: Impact wrenches are convenient for initial installation, but terrible for precision. Always use a torque wrench for final tightening, even if you used an impact to start.
Torquing wheels while lifted: Final torque should be applied with wheels on the ground and vehicle weight on suspension. Torquing in the air measures thread friction, not clamping force.
Ignoring torque sequence: Going around in a circle instead of a star/cross pattern creates uneven pressure and can warp rotors or prevent proper seating.
Using worn or damaged lug nuts: Rounded-off lugs, stripped threads, or corroded nuts won’t torque properly and should be replaced before retorquing.
Over-trusting “feel”: Even experienced mechanics can’t consistently apply correct torque by feel. The torque wrench exists because humans can’t sense 80 vs. 100 ft-lbs of force accurately.
Forgetting to reset adjustable torque wrenches: If you adjusted your wrench for a different job, make sure it’s reset to the correct specification before retorquing wheels.
Using uncalibrated tools: Torque wrenches lose calibration over time. Have yours checked annually or verify against a known-good wrench periodically.
Frequently Asked Questions
Q: How soon should I retorque after getting new tires?
A: Within 50-100 miles of driving. Most shops recommend 50 miles (80 km) as the sweet spot for catching any loosening before it becomes dangerous.
Q: Do I need to retorque every time I remove a wheel?
A: Yes. Any time lug nuts are removed and reinstalled—tire change, brake work, bearing replacement—retorquing after 50-100 miles is necessary.
Q: Can I skip retorquing if I only drove a short distance?
A: No. The settling and seating process begins immediately. Even 10-20 miles can be enough for lug nuts to loosen significantly. Follow the 50-100 mile guideline regardless of how little you’ve driven.
Q: What if the shop didn’t mention retorquing?
A: Ask them explicitly. Reputable shops should either perform a retorque before you leave (after the test drive) or provide clear instructions to return. If they dismiss it as unnecessary, consider finding a different shop.
Q: How tight should lug nuts feel by hand after retorquing?
A: You can’t judge by feel. That’s precisely why torque wrenches exist. 80 ft-lbs and 120 ft-lbs might both “feel tight” but represent very different—and critical—specifications.
Q: Can I retorque too many times?
A: Repeated loosening and retightening can eventually damage threads and studs, but checking 2-3 times after installation (50 miles, then 500 miles, then annually) won’t cause problems.
Q: Do new wheels and tires need retorquing more than once?
A: Initial retorque at 50-100 miles is critical. A second check at 500-1,000 miles isn’t required but adds peace of mind, especially if you found loose lugs during initial retorque.
Q: What if I find loose lugs during retorque?
A: This is exactly what retorquing is for—you caught the problem. Retighten to spec and check again after another 50 miles. If lugs are loose again, have the wheel assembly inspected professionally.
Q: Should I retorque in both directions?
A: Lug nuts tighten clockwise (righty-tighty). Only torque in the tightening direction. Never loosen and retighten unless specifically correcting overtightening.
Q: Do aftermarket wheels require different retorque procedures?
A: Follow the same 50-100-mile retorque schedule, but verify torque specifications—some aftermarket wheels have different requirements than OEM wheels.
Quick Retorque Checklist
Here’s your simple reference checklist for tire retorquing:
Before You Leave the Shop:
✓ Ask about retorque policy/timing
✓ Get a reminder card or schedule a return appointment
✓ Verify they used a torque wrench (not just an impact gun)
✓ Note the correct torque specification for your vehicle
At 50-100 Miles:
✓ Return to shop for free retorque (if offered)
✓ OR perform DIY retorque with calibrated torque wrench
✓ Check all wheels, not just one or two
✓ Use proper star/cross pattern sequence
✓ Note any loose lugs for the second check
For DIY retorquing:
✓ Find correct torque specification
✓ Set the torque wrench accurately
✓ Keep wheels on ground (vehicle weight on suspension)
✓ Use two-stage tightening (50% then 100%)
✓ Follow proper tightening sequence
✓ Verify each lug individually
After Retorquing:
✓ Note how many lugs needed tightening
✓ Schedule a second check if multiple lugs were loose
✓ Add retorque to the regular maintenance schedule
✓ Store torque wrench properly (usually at lowest setting)
Final Thoughts
Tire retorquing isn’t optional—it’s a simple step that keeps your wheels secure and your drives safe. A few minutes of attention now prevents headaches, costly repairs, and serious accidents later.
Whether you trust a shop or handle it yourself, the process is straightforward and rewarding. Take action, check your torque, and drive with confidence—because knowing your wheels are properly secured is peace of mind you can’t put a price on.